A Complete Guide for Taking Screenshot In Android 28
Prior to Android 28, we used to take a screenshot like this:
fun takescreenshot(v: View): Bitmap? {
    v.isDrawingCacheEnabled = true
    v.buildDrawingCache(true)
    val b = Bitmap.createBitmap(v.drawingCache)
    v.isDrawingCacheEnabled = false
    return b
}
But since Android 28 these methods are now deprecated because of Performance issues:
buildDrawingCache
getDrawingCache
setDrawingCacheEnabled
From Android Documentation:
This method was deprecated in API level 28. The view drawing cache was largely made obsolete with the introduction of hardware-accelerated rendering in API 11. With hardware-acceleration, intermediate cache layers are largely unnecessary and can easily result in a net loss in performance due to the cost of creating and updating the layer. In the rare cases where caching layers are useful, such as for alpha animations,
setLayerType(int, android.graphics.Paint)handles this with hardware rendering. For software-rendered snapshots of a small part of the View hierarchy or individual Views it is recommended to create aCanvasfrom either aBitmaporPictureand calldraw(android.graphics.Canvas)on the View. However these software-rendered usages are discouraged and have compatibility issues with hardware-only rendering features such asConfig.HARDWAREbitmaps, real-time shadows, and outline clipping. For screenshots of the UI for feedback reports or unit testing thePixelCopyAPI is recommended.
So how exactly we must take a screenshot in new Android Versions
The answer to this question is not simple. Method of taking screenshots in Android changes based on View Type:
All Android Views Except SurfaceView and it’s direct subclasses: GLSurfaceView, VideoView
If the View you want you to want to capture is any Android View except the Surface View or its direct subclasses then you can use Canvas to capture the view as BitMap.
For normal Android View, you can create a Canvas with the specified bitmap to draw into. Then ask the view to draw over that Canvas and this will fill the Bitmap with Views content.
/**
 * Copy View to Canvas and return bitMap
 * Won't work on Surface View
 */
fun getBitmapFromView(view: View): Bitmap? {
    var bitmap =
        Bitmap.createBitmap(view.width, view.height, Bitmap.Config.ARGB_8888)
    val canvas = Canvas(bitmap)
    view.draw(canvas)
    return bitmap
}
Or you can fill the canvas with a default color before drawing it with the view:
/**
 * Copy View to Canvas and return bitMap and fill it with default color
 * Won't work on Surface View
 */
fun getBitmapFromView(view: View, defaultColor: Int): Bitmap? {
    var bitmap =
        Bitmap.createBitmap(view.width, view.height, Bitmap.Config.ARGB_8888)
    var canvas = Canvas(bitmap)
    canvas.drawColor(defaultColor)
    view.draw(canvas)
    return bitmap
}
This method will not gonna work for surface view reason for that is surface view is a dedicated drawing surface embedded inside of a view hierarchy.
Usage:
getBitmapFromView(rootView)
getBitmapFromView(rootView, Color.GRAY)
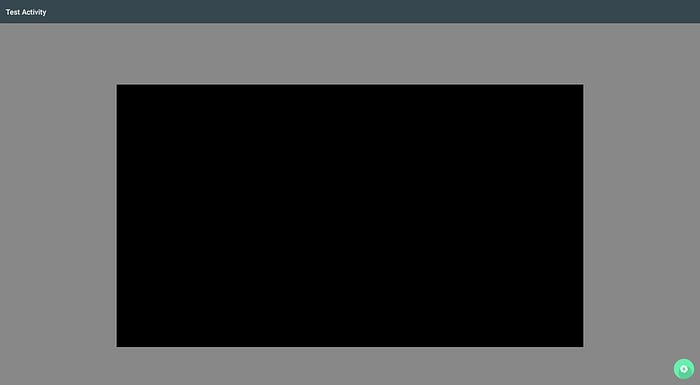
Result:
Limitation: If you try to capture activity with a surface view using this method then it will be Capture as a Black Hole.

For Surface View and its Direct Subclasses GLSurfaceView, VideoView
From Android API 24≥ we can use Pixel Copy which mechanisms to issue pixel copy requests to allow for copy operations from Surface to Bitmap
/**
 * Pixel copy to copy SurfaceView/VideoView into BitMap
 * Work with Surface View, Video View
 * Won't work on Normal View
 */
 fun getBitMapFromSurfaceView(videoView: SurfaceView, callback: (Bitmap?) -> Unit) {
    val bitmap: Bitmap = Bitmap.createBitmap(
        videoView.width,
        videoView.height,
        Bitmap.Config.ARGB_8888
    );
    try {
    // Create a handler thread to offload the processing of the image.
    val handlerThread = HandlerThread("PixelCopier");
    handlerThread.start();
    PixelCopy.request(
        videoView, bitmap,
        PixelCopy.OnPixelCopyFinishedListener { copyResult ->
            if (copyResult == PixelCopy.SUCCESS) {
                callback(bitmap)
            }
            handlerThread.quitSafely();
        },
        Handler(handlerThread.looper)
    )
    } catch (e: IllegalArgumentException) {
        callback(null)
        // PixelCopy may throw IllegalArgumentException, make sure to handle it
        e.printStackTrace()
    }
}Usage:
getBitMapFromSurfaceView(videoView) { bitmap: Bitmap? ->
    doSomethingWith(bitmap)
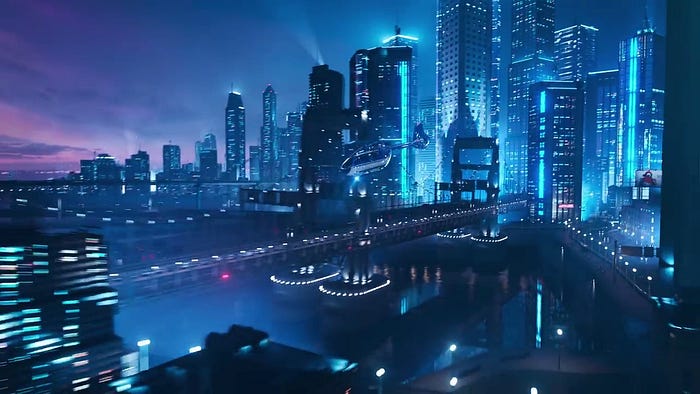
}Result: Video View is captured by PixelCopy

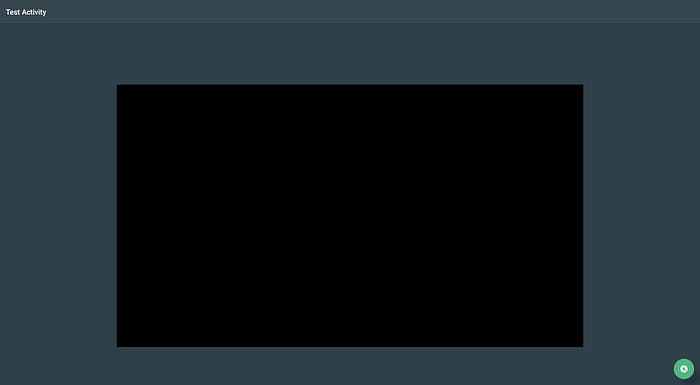
Pixel Copy can be requested to create a BitMap for a View but the result would be the same as what we had with the Canvas approach ie. Surface View will be shown as Black Hole
/**
 * Pixel copy to copy Any View into BitMap
 * Worn"t work on Surface View
 */
fun getBitmapFromWindow(rootView: View, activity: AppCompatActivity, callback: (Bitmap?) -> Unit) {
    activity.window?.let { window ->
        val bitmap = Bitmap.createBitmap(rootView.width, rootView.height, Bitmap.Config.ARGB_8888)
        val locationOfViewInWindow = IntArray(2)
        rootView.getLocationInWindow(locationOfViewInWindow)
        try {
            PixelCopy.request(window,
                Rect(locationOfViewInWindow[0],
                         locationOfViewInWindow[1],
                    locationOfViewInWindow[0] + rootView.width,
                    locationOfViewInWindow[1] + rootView.height),
                bitmap,
                { copyResult ->
                if (copyResult == PixelCopy.SUCCESS) {
                    callback(bitmap)
                }else {
                    callback(null)
                }
                // possible to handle other result codes ...
            }, Handler())
        } catch (e: IllegalArgumentException) {
            callback(null)
            // PixelCopy may throw IllegalArgumentException, make sure to handle it
            e.printStackTrace()
        }
    }
}Usage:
getBitmapFromWindow(rootView,this@TestActivity) { bitmap: Bitmap? ->
    doSomethingWith(bitmap)
}Result: See the Video View is captured as a black screen even though a movie is playing

So we saw we can take a screenshot of either view or SurfaceView but not both at the same time. If we want to capture both at the same time then we need to use Media Projection APIs
Media Projection To Capture Both Normal Views & Surface View
Media Projection API allows us to project Android Screen onto a Virtual Display. Virtual Display is nothing but a Surface View that renders the contents of Screen.
It requires quite a lot of code
Add This variable in your activity class:
//PROJECTION
private var mProjectionManager: MediaProjectionManager? = null
private var mImageReader: ImageReader? = null
private var mHandler: Handler? = null
private var mDisplay: Display? = null
private var mVirtualDisplay: VirtualDisplay? = null
private var mDensity = 0
private var mWidth = 0
private var mHeight = 0
private var mRotation = 0
private var mOrientationChangeCallback: OrientationChangeCallback? = null...companion object {
    private val TAG = TestActivity::class.java.name
    private const val REQUEST_CODE = 100
    private var STORE_DIRECTORY: String? = null
    private var IMAGES_PRODUCED = 0
    private const val SCREENCAP_NAME = "Capture"
    private const val VIRTUAL_DISPLAY_FLAGS =
        DisplayManager.VIRTUAL_DISPLAY_FLAG_OWN_CONTENT_ONLY or DisplayManager.VIRTUAL_DISPLAY_FLAG_PUBLIC
    private var sMediaProjection: MediaProjection? = null
}
In onCreate initiate MEDIA_PROJECTION_SERVICE manager instance.
override fun onCreate(savedInstanceState: Bundle?) {
    super.onCreate(savedInstanceState)
...// call for the projection manager
mProjectionManager =
    getSystemService(Context.MEDIA_PROJECTION_SERVICE) as MediaProjectionManager

// start capture handling thread
object : Thread() {
    override fun run() {
        Looper.prepare()
        mHandler = Handler()
        Looper.loop()
    }
}.start()/Start projection
startButton.setOnClickListener { startProjection() }

// stop projection
stopButton.setOnClickListener { stopProjection() }}
Methos to Start and stop Media Projection
private fun startProjection() {
 startActivityForResult(mProjectionManager!!.createScreenCaptureIntent(), REQUEST_CODE)
}

private fun stopProjection() {
    mHandler!!.post {
        if (sMediaProjection != null) {
            sMediaProjection!!.stop()
        }
    }
}
Once fired the createScreenCaptureIntent intent will return Activity Result. This will pop up a dialog for user consent.
Once the Activity Result came we need to create a Virtual display
override fun onActivityResult(requestCode: Int, resultCode: Int, data: Intent?) {
    super.onActivityResult(requestCode, resultCode, data)

    if (requestCode == REQUEST_CODE) {
        sMediaProjection = mProjectionManager!!.getMediaProjection(resultCode, data)
        if (sMediaProjection != null) {

            // display metrics
            val metrics = resources.displayMetrics
            mDensity = metrics.densityDpi
            mDisplay = windowManager.defaultDisplay
            // create virtual display depending on device width / height
            createVirtualDisplay()
            // register orientation change callback
            mOrientationChangeCallback = OrientationChangeCallback(this)
            if (mOrientationChangeCallback!!.canDetectOrientation()) {
                mOrientationChangeCallback!!.enable()
            }
            // register media projection stop callback
            sMediaProjection!!.registerCallback(MediaProjectionStopCallback(), mHandler)
        }
    }
}private fun createVirtualDisplay() { // get width and height
    val size = Point()
    mDisplay!!.getSize(size)
    mWidth = size.x
    mHeight = size.y
    // start capture reader
    mImageReader = ImageReader.newInstance(mWidth, mHeight, PixelFormat.RGBA_8888, 2)
    mVirtualDisplay = sMediaProjection!!.createVirtualDisplay(
        SCREENCAP_NAME,
        mWidth,
        mHeight,
        mDensity,
        VIRTUAL_DISPLAY_FLAGS,
        mImageReader!!.surface,
        null,
        mHandler
    )
    mImageReader!!.setOnImageAvailableListener(ImageAvailableListener(), mHandler)
}
OnImageAvailableListener will get a call back will be called when the next Imag e object will be available. Once you get the Image you can create a BitMap out of it
private inner class ImageAvailableListener : ImageReader.OnImageAvailableListener {
    override fun onImageAvailable(reader: ImageReader) {
        var image: Image? = null
        var resizedBitmap: Bitmap? = null
        try {
            image = reader.acquireLatestImage()
            if (image != null) {
                val planes = image.planes
                val buffer = planes[0].buffer
                val pixelStride = planes[0].pixelStride
                val rowStride = planes[0].rowStride
                val rowPadding = rowStride - pixelStride * mWidth
                // create bitmap
                val bitmap = Bitmap.createBitmap(
                    mWidth + rowPadding / pixelStride,
                    mHeight,
                    Bitmap.Config.ARGB_8888
                )

                //fill from buffer
                bitmap.copyPixelsFromBuffer(buffer)

                //DO SOMETHING WITH CAPTURE BITMAP

                bitmap.recycle()


            }
        } catch (e: Exception) {
            e.printStackTrace()
        } finally {
            image?.close()
        }
    }
}
private inner class OrientationChangeCallback internal constructor(context: Context?) :
    OrientationEventListener(context) {
    override fun onOrientationChanged(orientation: Int) {
        val rotation = mDisplay!!.rotation
        if (rotation != mRotation) {
            mRotation = rotation
            try { // clean up
                if (mVirtualDisplay != null) mVirtualDisplay!!.release()
                if (mImageReader != null) mImageReader!!.setOnImageAvailableListener(null, null)
                // re-create virtual display depending on device width / height
                createVirtualDisplay()
            } catch (e: Exception) {
                e.printStackTrace()
            }
        }
    }
}
private inner class MediaProjectionStopCallback : MediaProjection.Callback() {
    override fun onStop() {
        Log.e("ScreenCapture", "stopping projection.")
        mHandler!!.post {
            if (mVirtualDisplay != null) mVirtualDisplay!!.release()
            if (mImageReader != null) mImageReader!!.setOnImageAvailableListener(null, null)
            if (mOrientationChangeCallback != null) mOrientationChangeCallback!!.disable()
            sMediaProjection!!.unregisterCallback(this@MediaProjectionStopCallback)
        }
    }
}
Once setup is completed simply call startProjection() to start capturing screen:
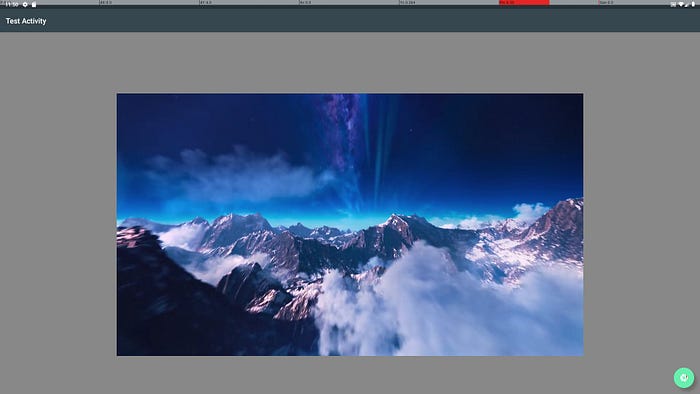
Result: You can see both Normal Views and Surface View in Media Projection screen shots:

That is all for now. Please like and hit the clap:)
Follow me on Tweeter for Inspiring demos: https://twitter.com/HiteshSahu_
Visit my site https://hiteshsahu.com/lab for awesome WebGL Demos
